
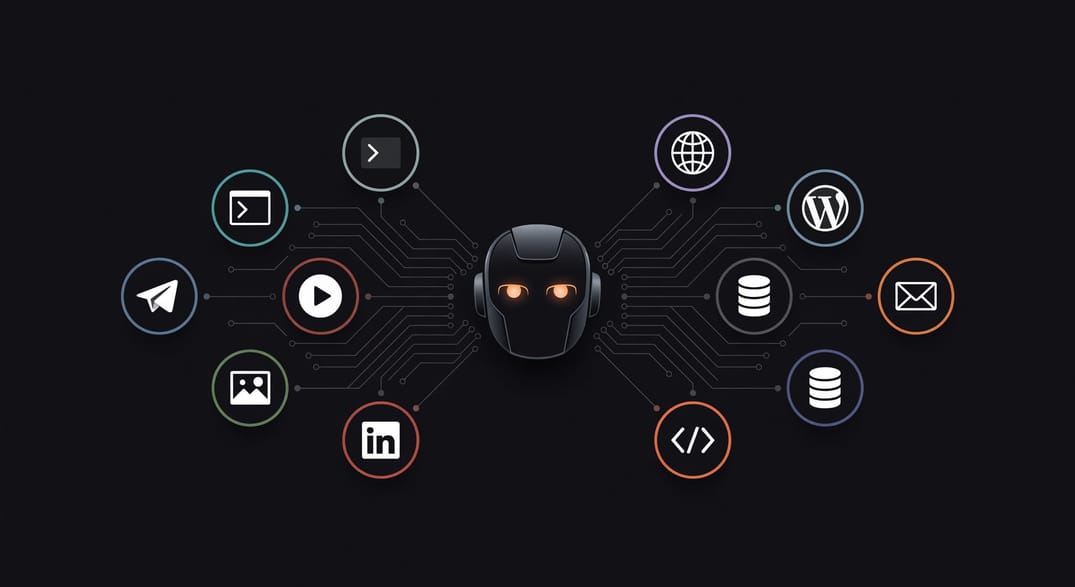

Generative AI has been around since 2021. Tool execution since mid-2023. But until November 2025, it was still fundamentally one input, one output, a smarter chatbot at best. No memory. No context. No persistence. Just text in, text out.
Then Peter Steinberger shipped OpenClaw in November 2025 and everything changed. Now, AI is not just text in, text out.
With Openclaw, It is "Text In" -> Actual actions -> "Text Out".
And for the first time, an AI agent can remember things permanently. For example, If you mention your birthday, address, anniversary date, children name, Company name, projects, and repeated preferences, It can save it to permanent memory based on the importance of information.
Similarly, It also remembers everything about your vibe coding projects, including internal context of the projects as well as your preferences for specific projects. For example, You can ask it to use or not-use any specific dependency within your project and it will follow the same instructions today, as well as tomorrow. It doesn't forget.
And, Here is what my single Openclaw Instance does for me on day-to-day basis.
- One-shot MVPs and Internal tools (literally).
- Build big projects in days, not months. Generate 100s of test cases quickly.
- Help me manage E-mails and Campaigns in Mautic.
- Manage and Monitor security on my applications via ServerAvatar.
- Manage my schedule for content creation and publishing.
- Generate videos, images, and text content for any purpose.
- Self-learns and updates few AI skills that I need on regular basis.
- Surf websites, Understand design systems, and fix visual bugs on projects.
- Curates News from me from my favourite and reliable sources periodically and delivers me in the format I like.
- Informs me if any of the World Market Indices move more than 3% in a day.
- Manages my WordPress sites with WP-CLI and SSH.
- Much more ...
In short, If there is any programmatic way possible to do anything, It can do it. It's capabilities also depends on the access it has on the machine. For example, If it doesn't have "sudo" access on the machine, It can't install software for you - You'd have to do the setups manually. But if it has sudo access, It can execute sudo commands and install and configure Full tech stack for you on your server.
And the best thing about it is, You do not need GPUs to make it work. It can orchestrate the model requests to different providers and it can use different models for different purposes as per your instructions.
Openclaw supports 1,000+ Models from 42+ providers. It means, It doesn't matter which provider credits you have, you can connect it with Openclaw and start utilising them. Openclaw also works with Token plans like OpenAI's and Anthopic's $20-$200 plans.
As long as you have AI access from any provider, You can utilise it in Openclaw.
In this article, I am going to show you How to deploy your first Openclaw AI agent without messing with terminals and without losing your hair.
I have configured more than 50 OpenClaw instances, and found out the best way to host secure Openclaw Instance while giving it ultimate access to the server and resources.
Let's get started!
Deploy your first Openclaw Instance in 10 minutes (No sysadmin skills required)
Setting up OpenClaw manually on a VPS or local PC is a headache. If you have tried it, You already know. Gateway doesn't stay up, random config errors, permission errors, Skills not installing issues, and the most frustrating, agent getting hanged mid-task.
Once the "Openclaw" setup is done, You need to secure your gateway and Webchat UI with SSL and domain, that is the completely different layer of setup on base Openclaw.
If you deploy it via ClawVPS, Here is what you get pre-built:
- Complete Openclaw setup with pre-configured key and AI credits.
- Secure connection to gateway via Domain, SSL and Nginx Reverse Proxy.
- Enchanced capabilities due to complete access on the server.
Step 1: Deploy a Free Instance on ClawVPS.ai
First of all, Navigate to ClawVPS.ai and register with Google or E-mail.
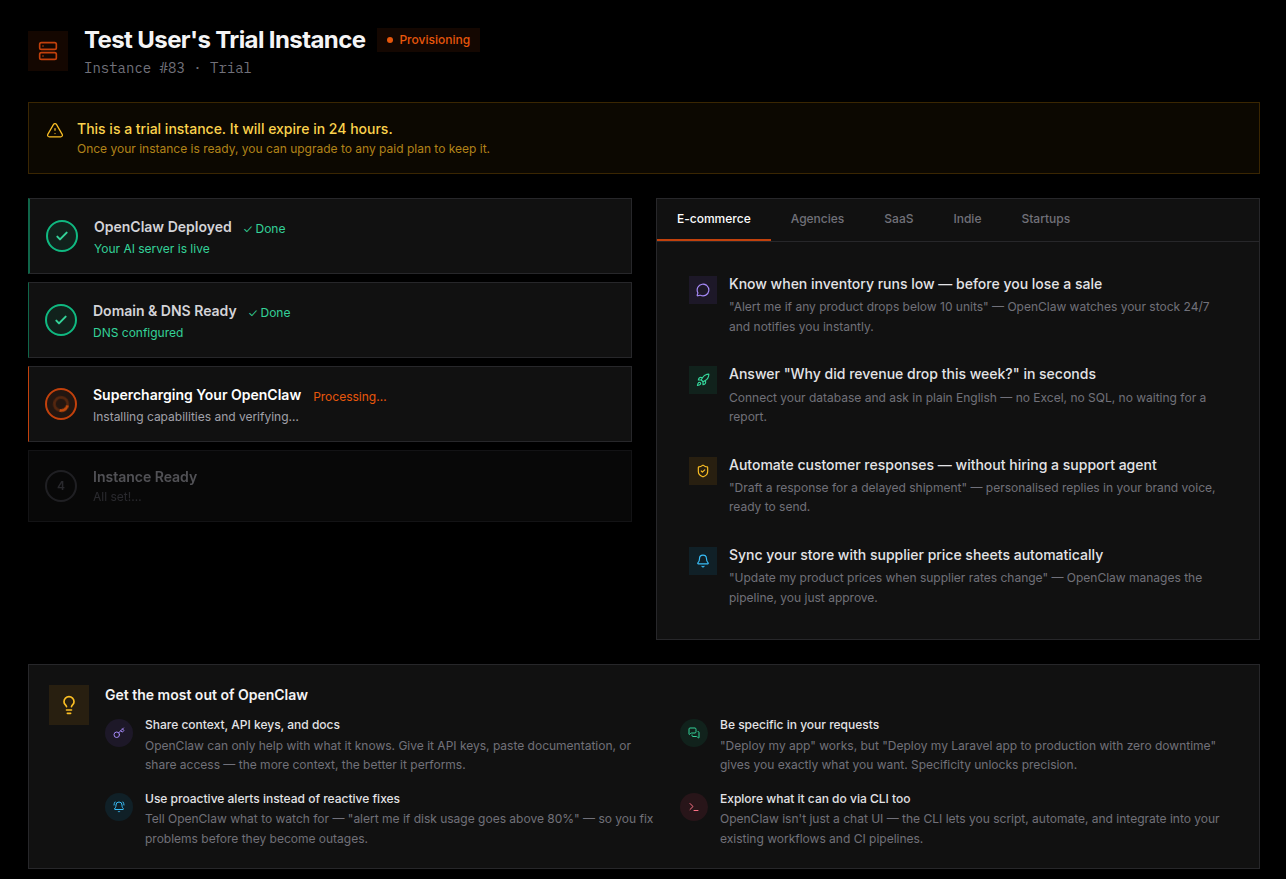
Once you are logged in, Click on Deploy Free Trial Instance. The system will instantly start the deployment of your AI agent. You will see a process just like the following image.
Once your agent is deployed, You will be redirected to the Instance management section that will look just like the following image.
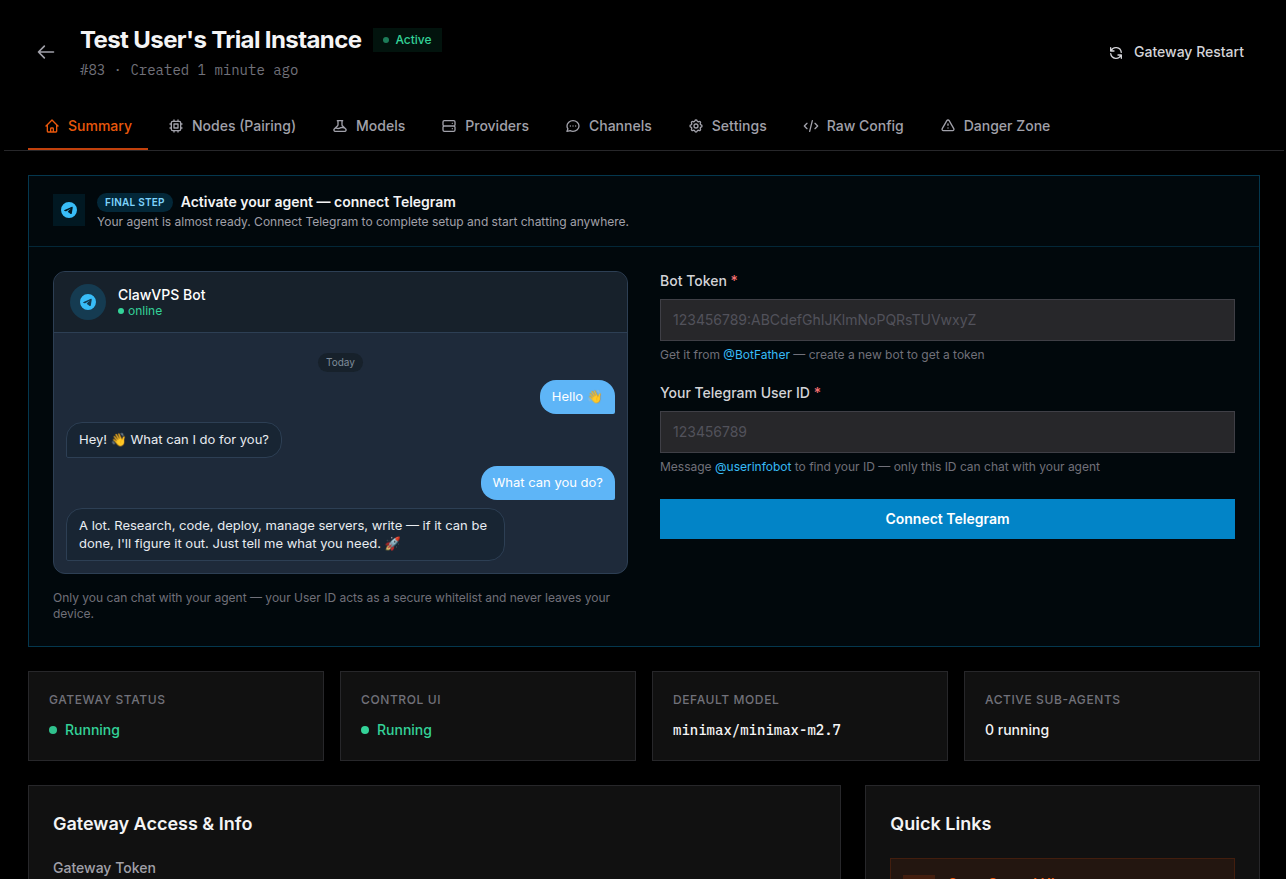
Step 2: Setup a Communication Channel
ClawVPS supports Telegram, Slack as well as Discord as communication channels for your agent. Your agent will stay Online 24*7 on any communication channel that you configure and will answer to you any time without any pre-process.
Telegram is the most recommended as it is secure and the easiest to setup. You just need to create a bot using @botfather and get your Telegram user id from @userinfobot. Then paste them into the Telegram connect form in ClawVPS.ai and click "Connect" or "Connect Telegram".
To verify if Telegram is successfully configured, You can go to "Channels" section in ClawVPS Instance Management and you will see something like this.
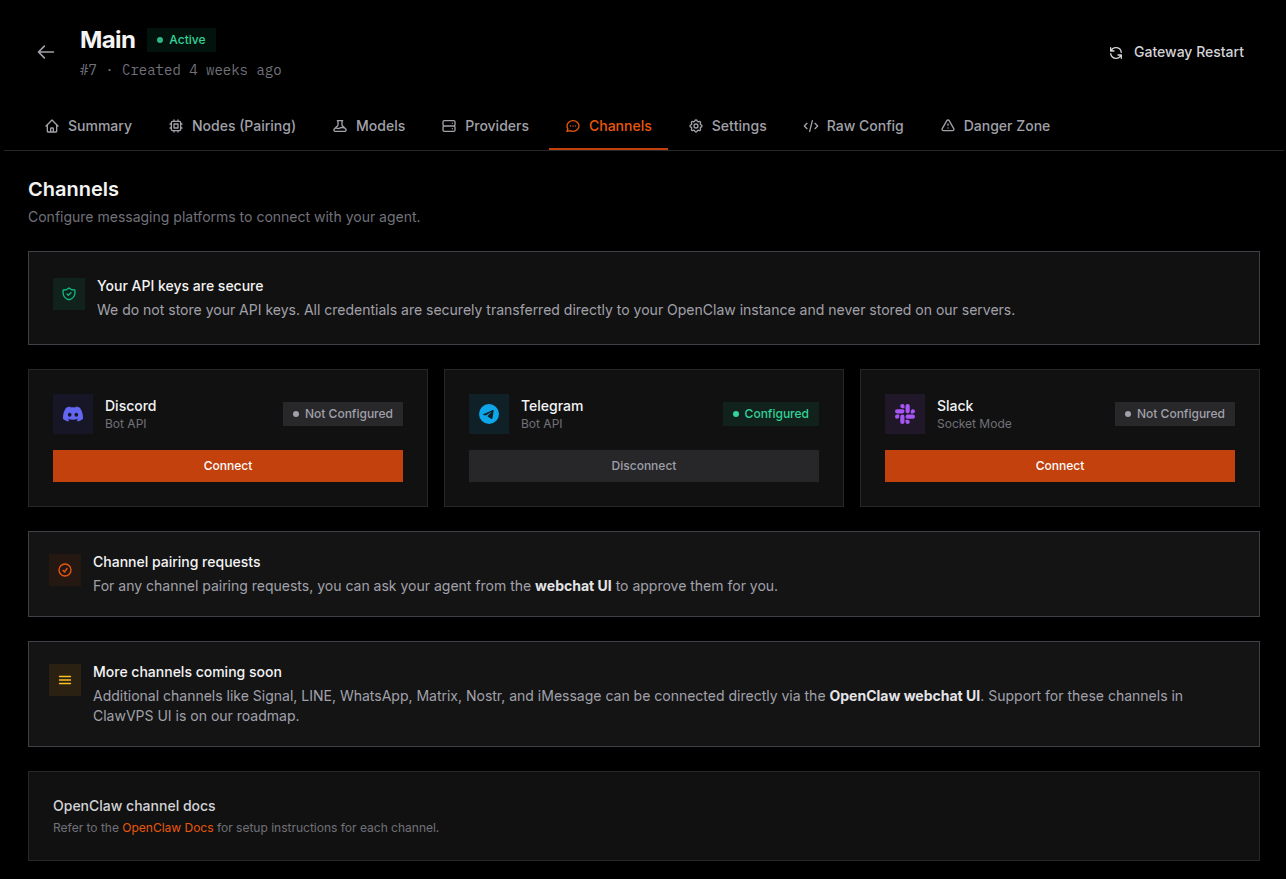
Once Telegram is connected, You can start chatting with your bot right away. It is now securely deployed on a VPS with ultimate access to it's environment. You have an Agent that can do almost everything you want, including managing it's own configuration like channels and models, deploying projects, and all other things I mentioned above, till now.
Step 3: Configure Your Provider
Go to your favourite provider console and generate an API key. Next, Go to "Providers" section in your ClawVPS.ai Instance management section, Click on the provider you would like to connect, Enter the API key, and Submit.
Once configured, The provider will be displayed as Configured, just like the following image.
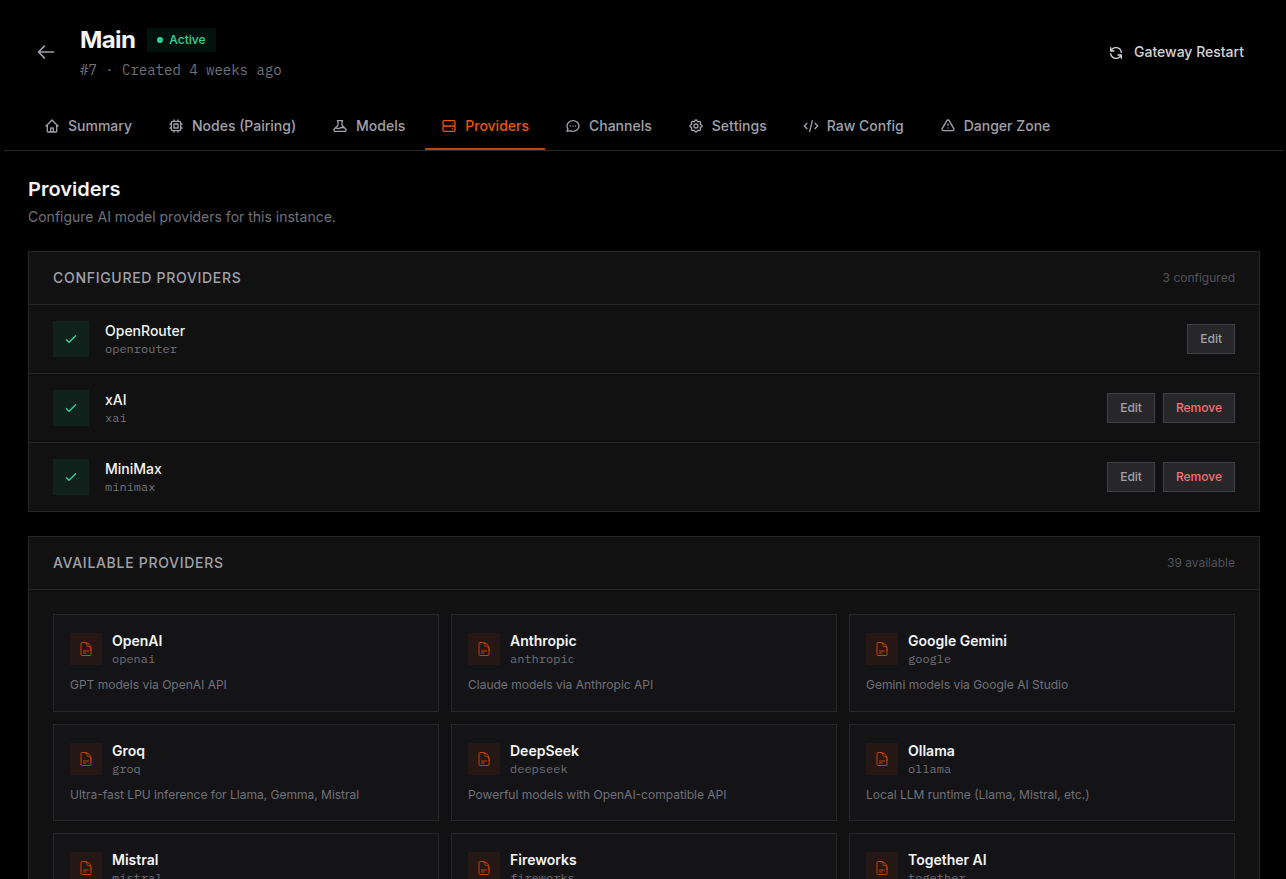
Once a provider is configured, You can add desired Models from the "Models" section.
For providers, You can also update the API key for access as well as you can remove a specific provider from your configuration entirely with a single click.
Step 4: Configure Your Models
In OpenClaw, You can configure multiple providers and multiple models. And use them based on the task at hand to optimise your cost.
To manage models for the configured providers, Go to "Models" section in ClawVPS.ai Instance Management section and you will see a list of configured providers and models just like the following image.
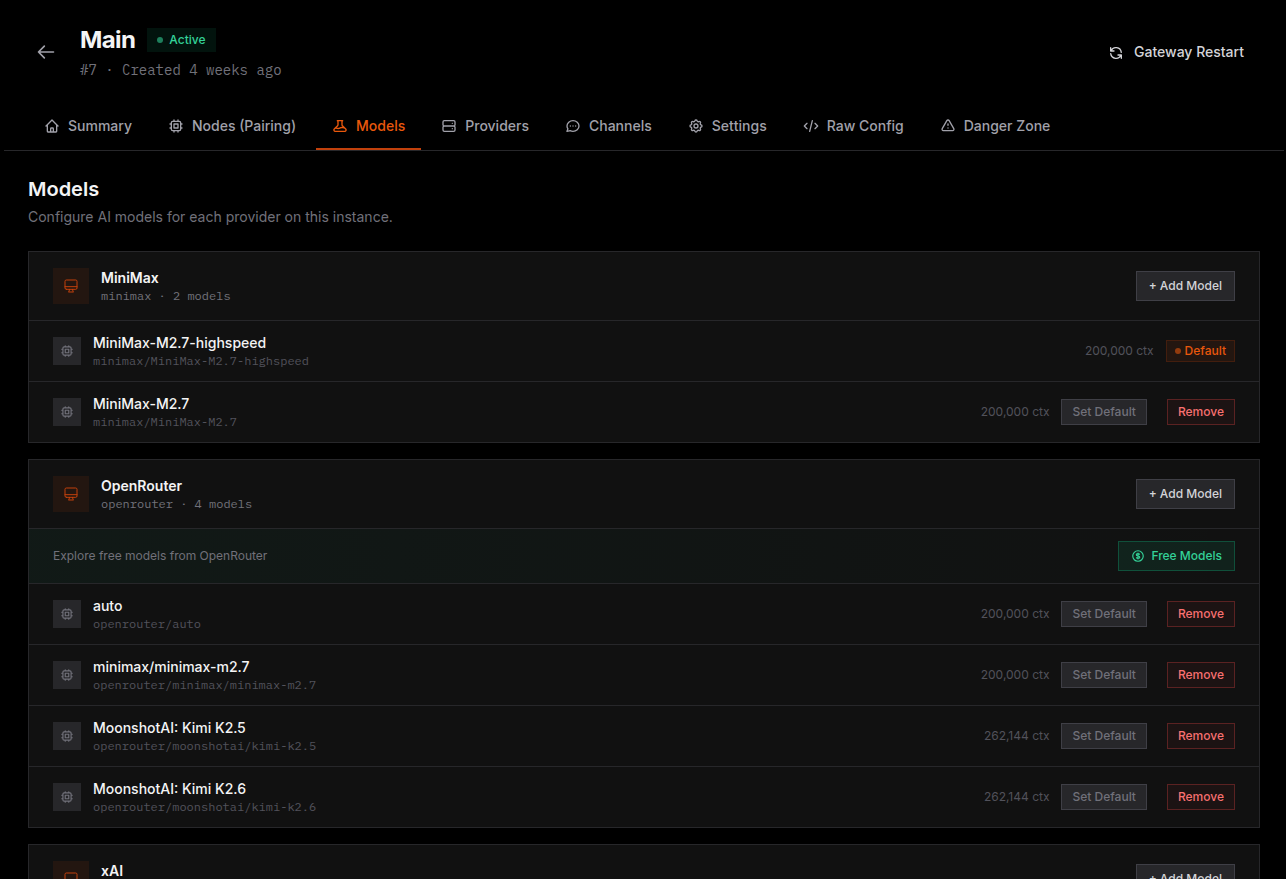
From this page, You can:
- Add New Models for configured providers.
- Set any model as default for your Openclaw instance.
- Remove models that you no longer want to use.
Once you have configured everything, Your complete setup is done.
Your OpenClaw instance will now live on this server, will have it's own environment, and will have ultimate independence to do anything on the server, which also means that it can perform some delicate, complicated tasks surgically to help you achieve your goal, including having multiple development environments on the same VPS it uses.
Conclusion: You're Closer to the Future Than You Think
OpenClaw isn't a demo or a proof-of-concept; It is what I use every single day for heavy development and research work. It is integrated into my day-to-day life and works like my personal jarvis. While I am completing this post, It is generating Featured images, meta descriptions, excerpts and all other required things.
The best part? You don't need to be a sysadmin to deploy OpenClaw anymore. Deploy on ClawVPS, connect Telegram, configure your provider, and your AI agent is live in 10 minutes.
This isn't about replacing you. It's about amplifying you, every repetitive task you hand off is energy redirected toward what actually matters.
The AI age isn't coming. It's here. And you can be in it before your next coffee gets cold.
Go try it.